Starting as a political news and celebrity portrait photographer in DC, Sam was instantly drawn to wedding photography as a space to promote more inventive ideas. Sam’s focus is on photographic techniques that are deceptively simple but have the potential to transform difficult or uninspiring shooting environments into one-of-a-kind opportunities for every photo made.
Introduction to AfterShoot AI
As a professional photographer who’s been using AfterShoot since its alpha stages, I’ve watched this AI-powered culling and editing tool evolve into an indispensable part of my workflow. In this comprehensive review, I’ll share my hands-on experience with AfterShoot’s latest features, particularly focusing on their AI editing capabilities.
Aftershoot Ai Culling and Editing Review
- Value - 10/1010/10
- Speed (Computer Dependent) - 9/109/10
- Accuracy (Culling) - 9/109/10
- Accuracy (Editing) - 7.9/107.9/10
- Ease of Use - 8.8/108.8/10
8.9/10
Quick Summary
After 4 years with AfterShoot, from alpha to current version, it has become an essential tool for professional photographers. The software’s standout features include local processing with no per-edit costs and impressive speed, processing over 4,000 images in under 10 minutes. While it occasionally struggles with white balance in complex lighting, particularly with newer cameras, it achieves a 90% success rate in basic editing decisions. Combined with hardware customization options and upcoming AI retouching features, AfterShoot offers a powerful balance of automation and creative control for photographers seeking to streamline their workflow.
Pros
- Lightning-fast processing (4,000+ images in under 15 minutes)
- Local processing with no per-edit costs or internet requirement
- Highly customizable workflow with hardware controller support
- Seamless integration with Lightroom Classic
Cons
- Occasional white balance issues in complex lighting situations
- AI cropping works best only in controlled environments
- Some features like AI masking may be unnecessary for certain shooting styles
What’s New in AfterShoot

The software has come a long way, now offering a one-click cull and edit option that streamlines the entire post-processing workflow. One of the most exciting upcoming features is AI retouch, which promises to add another layer of automation to the editing process.
My History with the Software
Having used AfterShoot for approximately 4 years, I’ve witnessed its evolution from basic culling to sophisticated AI-powered editing. My workflow has adapted alongside these improvements, and I’ve found ways to integrate it seamlessly with my existing Lightroom Classic setup.
Their algorithm excels at grouping duplicate photos and identifying when changes between them are significant enough to matter to you.
Workflow Integration
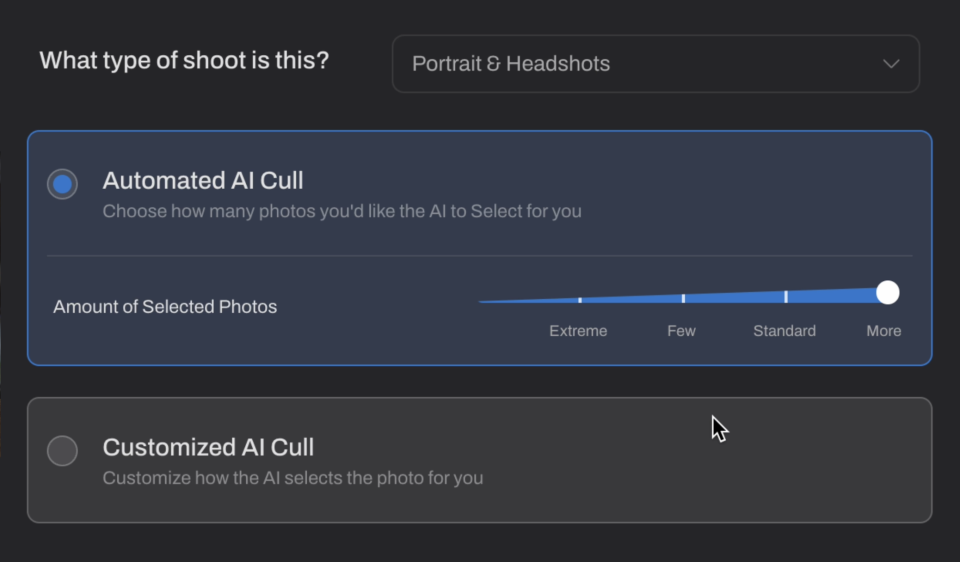
I personally still take a manual pass over everything the AI gives me - the "more" threshold tends to choose about 35% of the overall images and that's a good balance for me
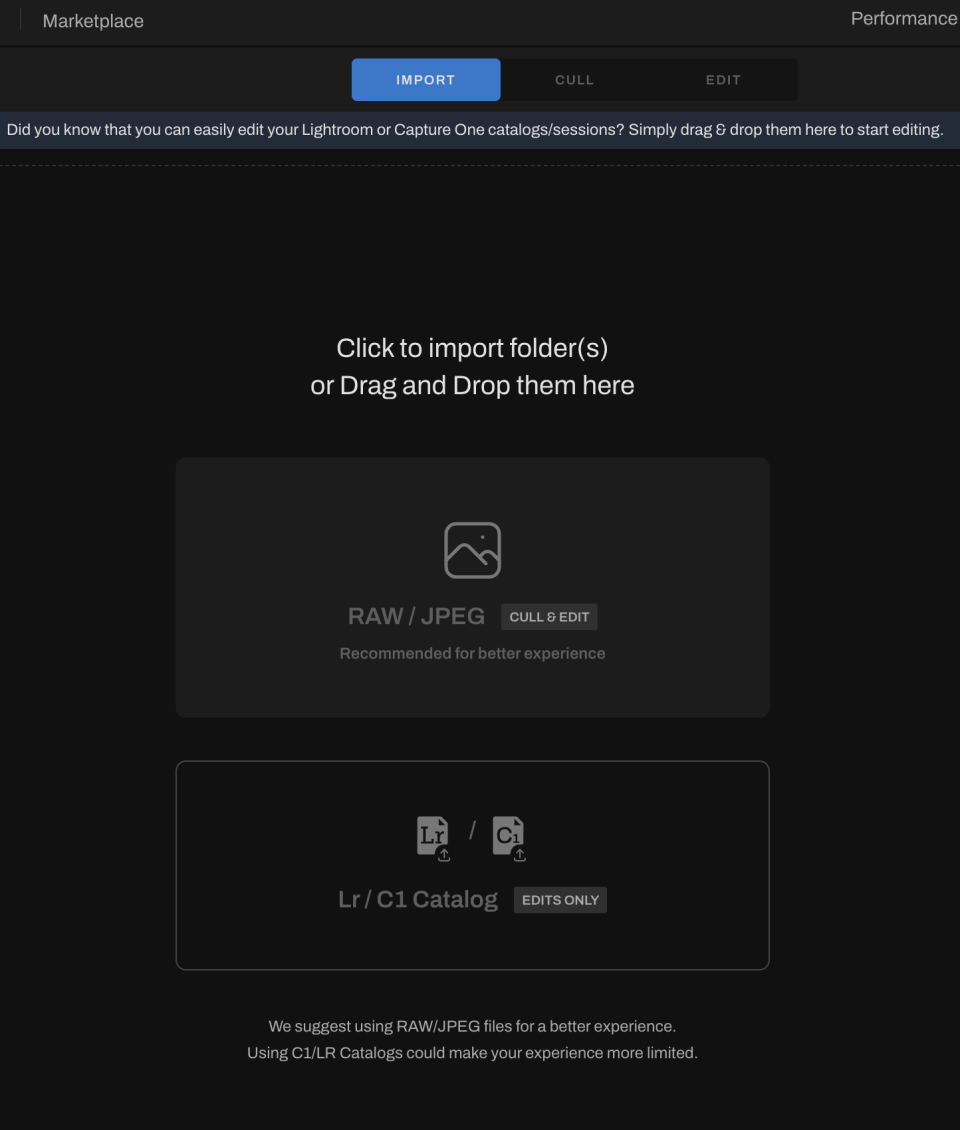
Initial Import Process
While AfterShoot offers various import options, including direct Lightroom catalog integration and backup features, I still prefer to handle my initial imports through Lightroom Classic. The reason is simple: Lightroom’s import dialogue is incredibly robust and perfectly aligned with my organizational needs. However, for photographers less committed to Lightroom Classic, AfterShoot’s import features might be a better fit.
 Hardware Controller Setup
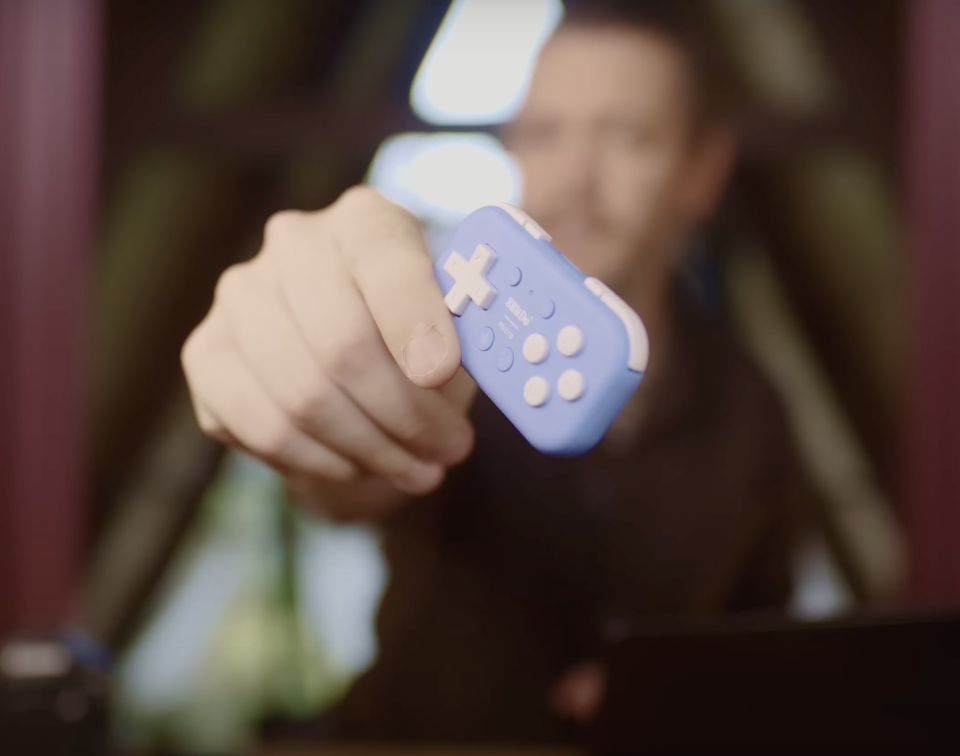
One of my favorite workflow enhancements involves using an 8BitDo remote controller (available for around $20 on Amazon) with software called Joystick Mapper. This setup (outlined here) allows for a more relaxed culling position away from the computer, providing a welcome break from the standard keyboard position. The controller can be customized to match your preferred shortcuts, making the culling process more efficient and ergonomic.
Real-World Testing
I start every session by running Aftershoot culling across the collection, and I don't see that changing anytime soon
The Culling Process
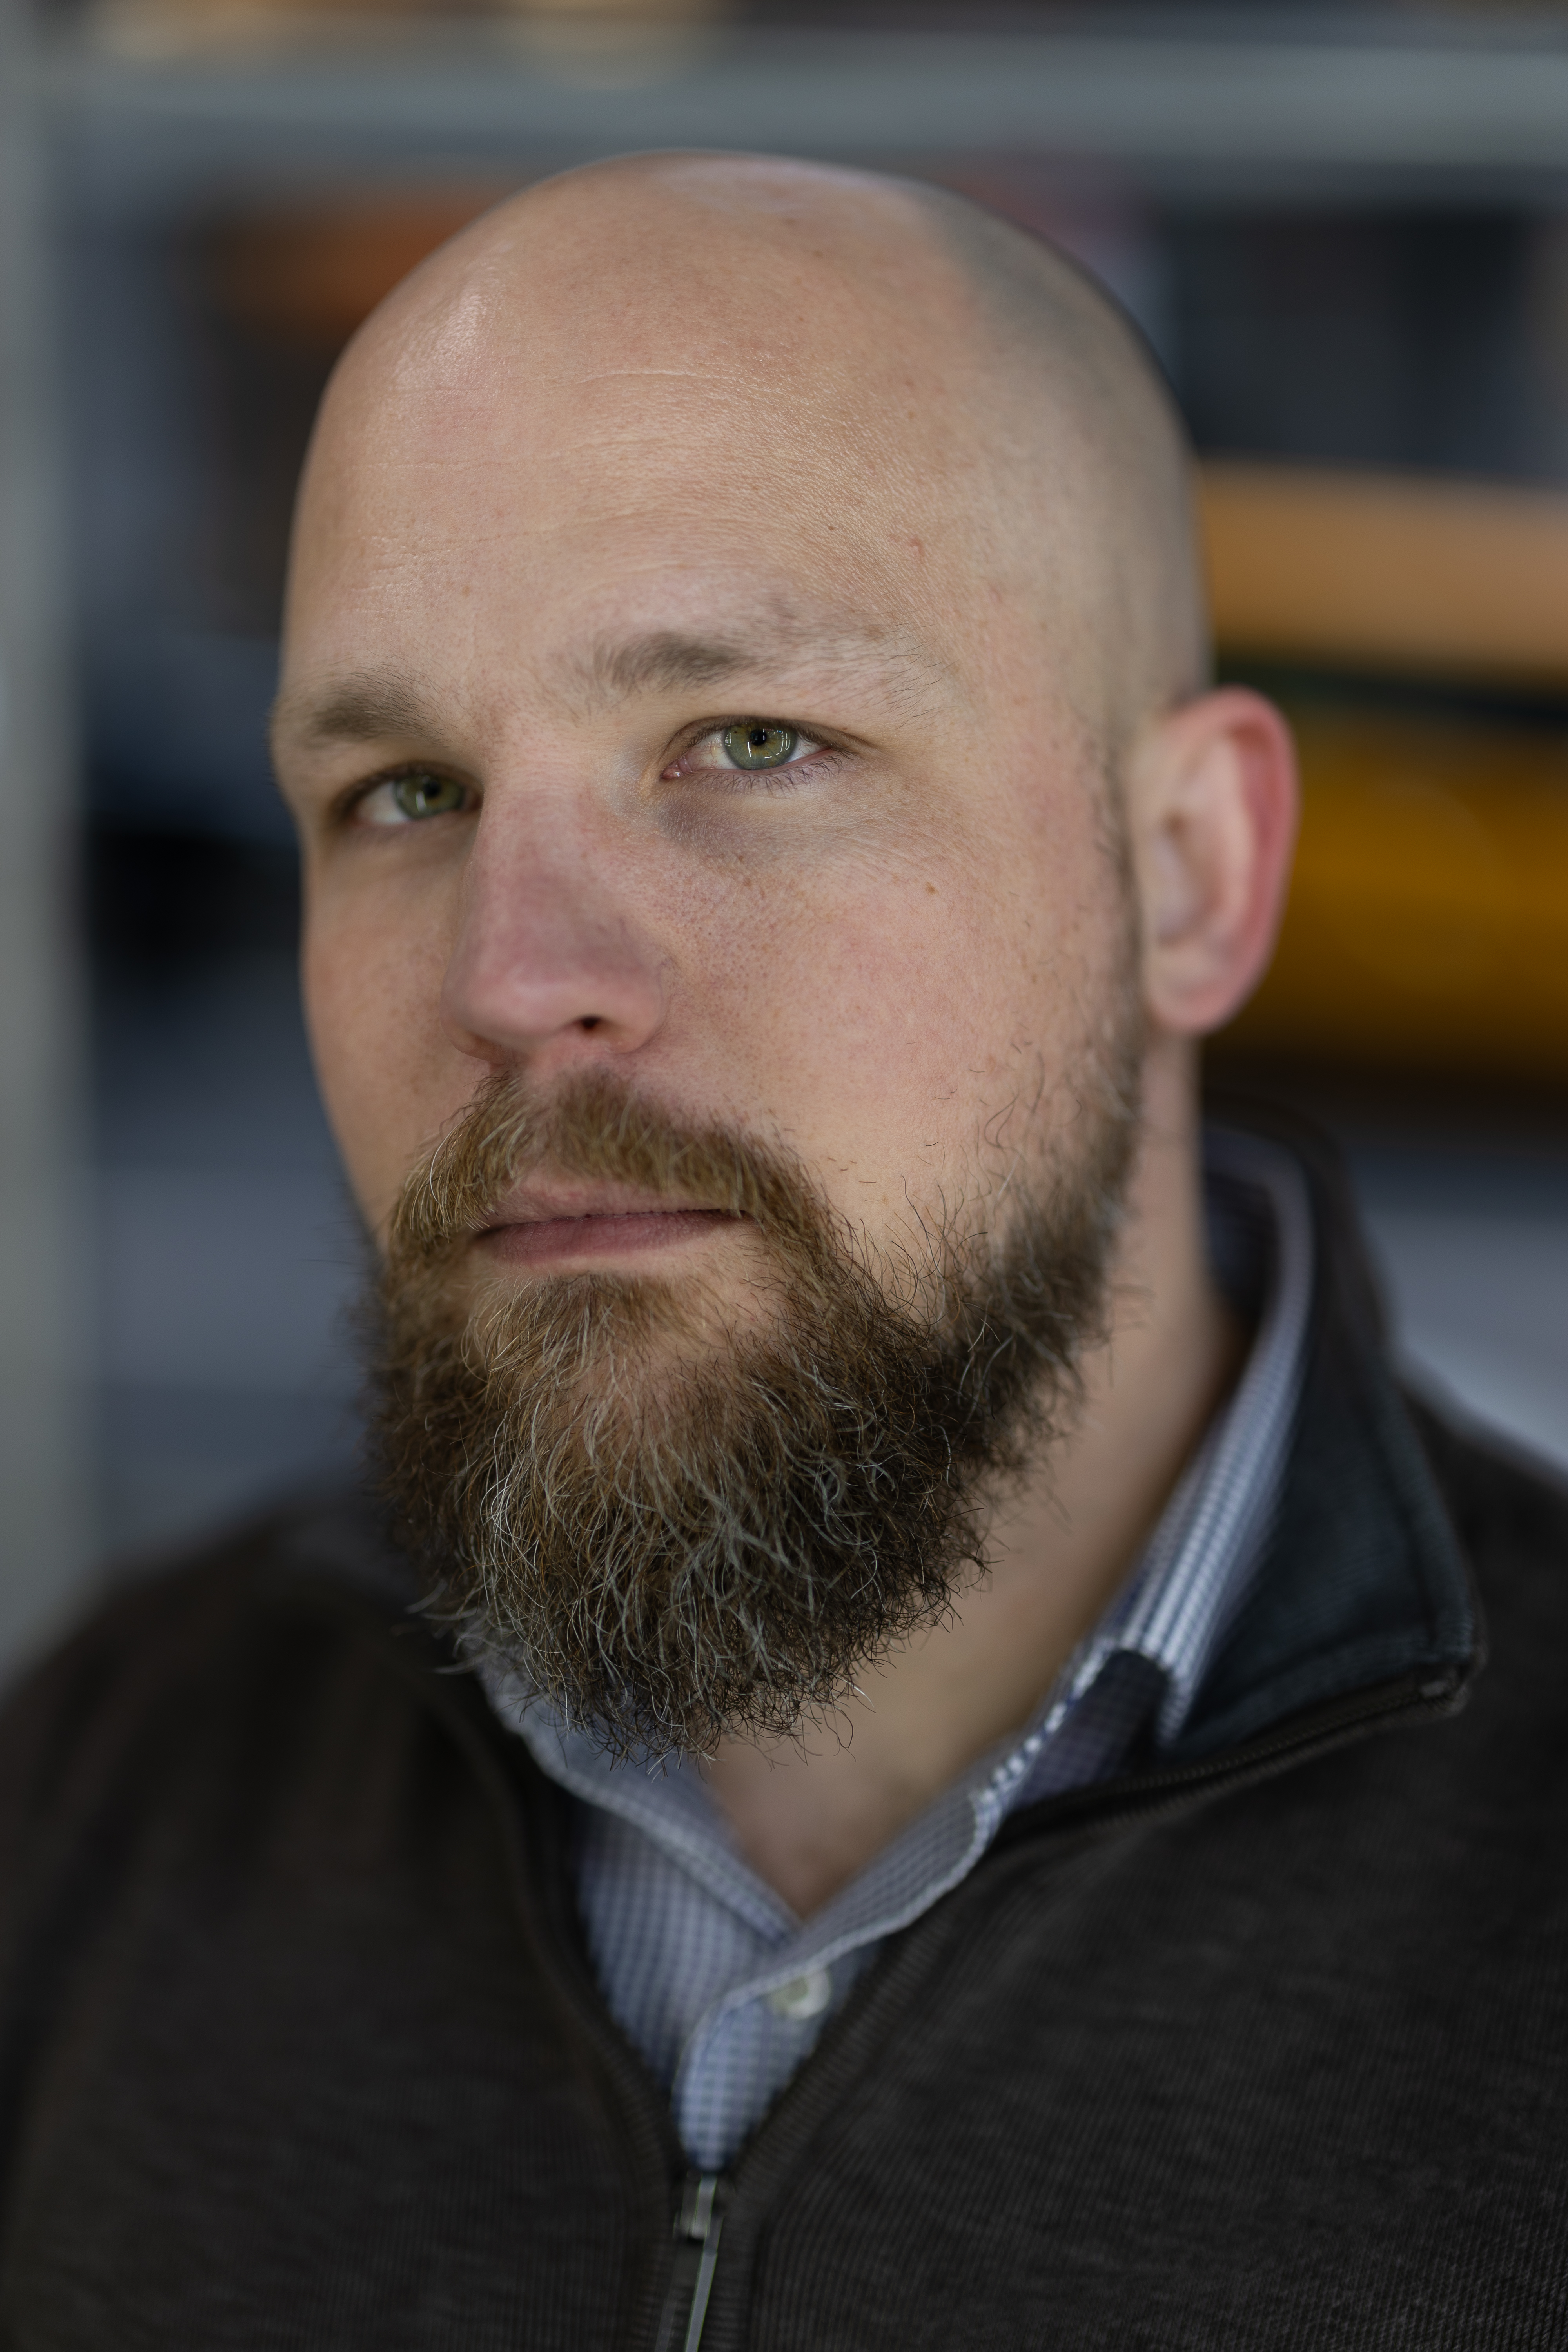
In my recent New York City shoot with Aaron, which included locations from Grand Central Station to the New York City Public Library, I put AfterShoot’s latest features to the test. The session yielded approximately 4,131 images, of which AfterShoot selected 905 for review – a significant reduction that streamlined my workflow considerably.

AI Editing Results
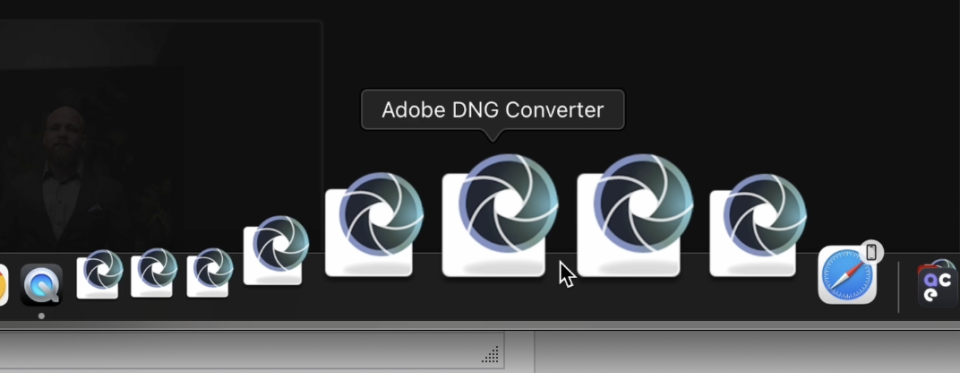
The editing process showed impressive speed, taking just 5 minutes to process 1,200 images. This efficiency comes from AfterShoot’s smart approach to processing: it converts the full-resolution RAW files into smaller DNG files for faster processing while maintaining enough quality for making broad editing decisions about exposure, tone, contrast, and white balance.
-
- Before
-

- After
Performance with Canon R1
One notable aspect of my testing involved the new Canon R1. While there was initially an error during the DNG conversion process (which is understandable given the camera’s newness), AfterShoot quickly resolved this issue. The software handled the R1’s files admirably, though I noticed some interesting behavior with white balance in mixed lighting scenarios – occasionally producing a cool color shift that required manual correction.
Join+
This post was originally published on my patreon feed, and over there it includes extras like sample raw files. My patreon has exclusive and in-depth image deconstructions, what’s in my bag details, live streams, and many other photographers that participate in discussions from all over the world – all without ads.
mentorships, reviews, deconstructions
Advanced Features
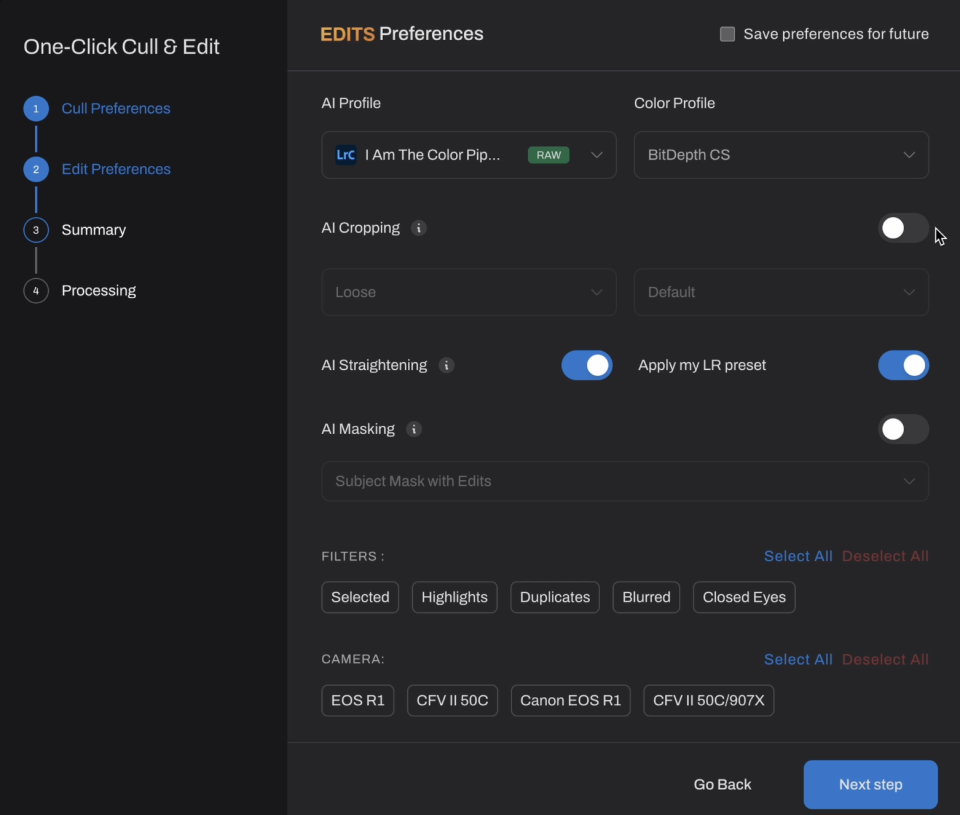
AfterShoot offers several AI-powered features that photographers can enable or disable based on their needs:
- AI Cropping: While available, I find it works best in controlled environments like studio sessions or student pictures. For dynamic shooting situations, I prefer maintaining manual control over composition.
- AI Straightening: This is one of my favorite features, consistently helping to level horizons and correct slight tilts in images.
- AI Masking: This feature detects subjects and allows selective adjustments. Though powerful, I often skip it since my shooting style (typically with wide apertures) naturally creates the separation I need.
Local Processing Benefits
One of AfterShoot’s significant advantages is its local processing capability. Unlike cloud-based alternatives that charge per edit, AfterShoot processes everything on your local machine. This means:
- No internet connection required during processing
- No per-edit costs
- Complete privacy of your images
Future Features
AfterShoot continues to evolve, with AI retouching being one of the most anticipated upcoming features. While still in testing during this review, it promises to add capabilities like skin smoothing and advanced portrait enhancements.
The results might be different, but it does cost you a few cents per edit. And with AfterShoot you just don’t even have to think about that math and it’s all done locally.
Conclusion and Recommendations
Who Should Use AfterShoot
AfterShoot is particularly valuable for:
- High-volume photographers (wedding, events, sports)
- Photographers looking to streamline their culling process
- Anyone wanting to maintain creative control while leveraging AI
- Photographers who prefer local processing over cloud-based solutions
Final Thoughts
After years of use, AfterShoot continues to impress with its balance of automation and user control. While it’s not perfect – occasionally struggling with white balance in complex lighting situations or requiring manual oversight – it achieves what I consider the sweet spot: getting you 90% of the way there while leaving room for creative control.
The software’s rapid processing speed, local operation, and intelligent culling make it an invaluable tool for photographers. When combined with custom hardware solutions like the 8BitDo controller, it creates an efficient and ergonomic workflow that significantly reduces post-processing time without compromising quality.
As AI technology continues to evolve, AfterShoot’s commitment to local processing and user control positions it uniquely in the market. Whether you’re a seasoned professional or just starting to scale your photography business, AfterShoot offers a compelling solution to the ever-present challenge of post-processing efficiency.
Remember, while AI tools like AfterShoot are incredibly powerful, they’re best used as part of a thoughtful workflow that maintains your creative vision while leveraging automation where it makes sense. The goal isn’t to replace human decision-making but to enhance it, allowing you to focus more on creative choices and less on repetitive tasks.